Posts Tagged ‘physics’

Reverseggle

Tuesday, July 25th, 2023

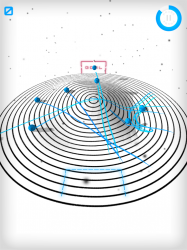
This backwards version of the classic casual game Peggle was built in 48 hours as my entry for the GMTK 2023 Games Jam. The theme for this year was “Roles Reversed”, and the suggestion was to play from a perspective we don’t usually get to play. So I built a game of Peggle, but rather than controlling the ball launcher, you play as the pegboard.

All 6 levels are unlocked, and each one changes the mechanics from the previous ones a little. It runs in the browser too, so it’s very easy to start playing. No need to download and install anything.

My entry came 805th out of almost 7000, which is in the top 12%. I’m pretty pleased with that!

Play here: Reverseggle (for desktop/laptop browsers).

Bridge Construction Chaos

Monday, July 13th, 2020

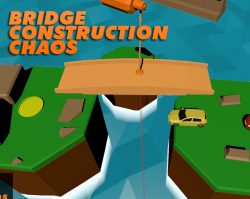
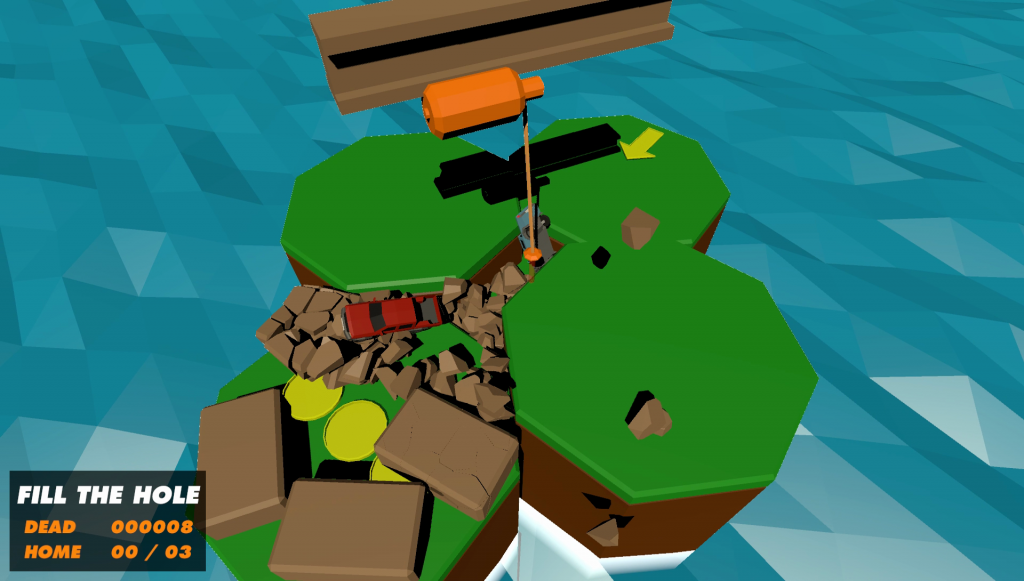
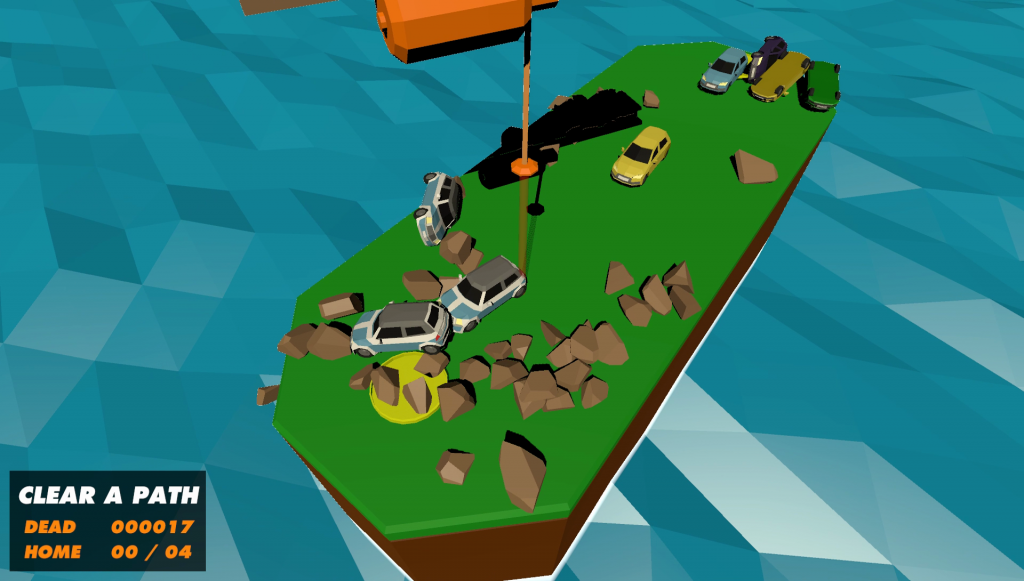
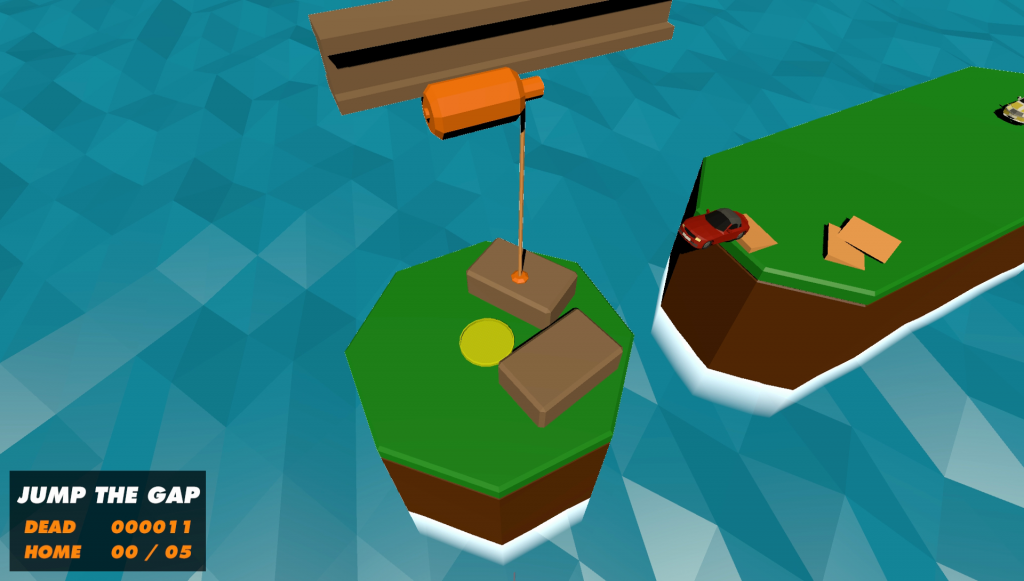
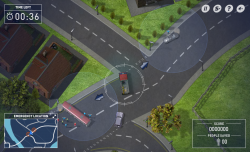
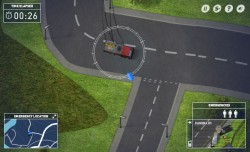
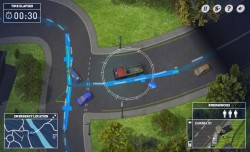
You have a magical sky crane, and a construction job to do. But the traffic hasn’t been stopped. You’ll just have to work around them I  guess. Don’t worry if a few innocents end up  in the water in the process. I’m almost sure they can swim.

  • – Controls are all on an XBox controller, and are shown  in game.
  • – Features 6 incredibly detailed challenging  levels.
  • – No winching the cars to the goal. Your mum didn’t raise you to be a cheat!
  • – Built by a team of one, in about a day and a half. For the GMTK Games Jam.

No need to complete levels if you don’t want to. You can skip back and forth as much as you like.

This was my entry to the second largest games jam in the world. Well over 5000 entries from over 18000 participants! It ranked in the top 20% of entries, with a top 10% rating for fun. I’ll take that as a win, especially as this was my first completed jam since my brain surgrey. I tried to enter GMTK in September 2018, but had to sleep for several days after just 3 hours of work on it! I had to sleep for several days after this too, but I got to the end and made it a proper entry in the jam.

Check out the game on deeperbeige.itch.io to view the trailer/walkthrough videos, or download it to play for free if you have an XBox controller.

Bending the Light

Tuesday, August 8th, 2017

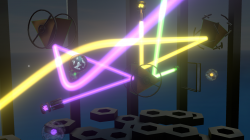
bending-the-lightDon your Oculus Rift headset and grab your Touch controllers for this mind-bending puzzle game. Manipulate beautiful beams of energy with all manner of tools to try and charge up the targets. Includes 40 levels, each with its own secrets to discover.

Play on Oculus Home

  • – 40 levels, each with secrets and collectables
  • – Designed for Oculus Touch
  • – Playable with gamepad
  • – Even playable with just a keyboard
  • – Abstract, dreamy, beautiful and atmospheric
  • – Meta-puzzles for those who solve everything else
  • – Low pressure, relaxing gameplay, but not simple!
  • – Can you achieve 100% completion?

Watch the trailer

See the walkthrough

Puzzle Putt

Saturday, October 17th, 2015

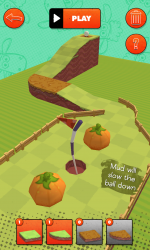
Puzzle PuttPlay crazy-golf with Shaun the Sheep! In this game though, you get to bend the course to your advantage by adding new blocks to the course. Can you get a hole in one? With 72 levels across 8 courses, there’s loads to conquer here. And if you’ve beaten the lot, why not make up your own levels with the built in editor? You can even capture and share instant replays of your best shots (or worst failures).

Download Puzzle Putt for iOS

Download Puzzle Putt for Android

Download Puzzle Putt for Kindle

This game was designed and built with Aardman Digital. They gave me loads of freedom to design the game, which is always a lot of fun. I wanted to build something unique, and which gives the player freedom to express themselves. The idea for Puzzle Putt is based roughly around the original Trackmania game, mixed with elements from Minecraft and of course other crazy-golf games that have been around forever.

Puzzle Putt: Three StarsTechnically, this build presents a few challenges. The first is the shot preview line. I really wanted the game to be more about solving the puzzle of how to get to the hole in the fewest shots, rather than being about performing the ideal shots with skill/judgement. To help the player achieve great shots, they need an aim prediction line that gives a lot of accurate detail about where their shot is going to go before committing to it.

The only way to get a super-accurate prediction line is to compute the shot via the physics engine, before it is played. You can’t write approximations and expect them to match the built in physics beyond the most basic of shots. Unfortunately, Unity’s physics engine is tied like clockwork to the FixedUpdate calls, and can’t be computed separately to the passage of real time. In other engines, you can often take a full copy of the physics world, then allow it to run several seconds of updates all within a single frame. Then you can present the results as a preview line instantly.

As the game was developed, it appeared totally insoluble within Unity. You simply don’t have API access to the physics engine at the level required to precompute outcomes. This was a classic case of designing around the problem, rather than solving it directly. Rather than giving the player an instant preview line, the game fires invisible golf balls into the scene continuously and records where they go. The frame by frame progress of each ball is shown as a separate preview line. It gives an interesting mix of perfect prediction, but delayed, so you can’t expect to easily find that perfect ridiculous implausible bounce shot. Add to that the imperfect precision of touch inputs, and it actually gives a lovely balance between prescience and guesswork.

Unity’s physics engine presented another challenge too. Since the levels are made from lots of separate blocks, the simple approach is to build them from lots of separate prefabs, each with their own built in collider to form the ground. The problem is that where two flat colliders meet, there’s a little seam. When a ball rolls across that seam, it sometimes catches on it and flips up into the air. This is a disaster for the gameplay since it gives unexpected bounces on smooth ground, and lets people break the level design by hopping over things they shouldn’t be able to.

The solution was fairly involved, and took a few iterations to get right. First, I built a separate mesh collider for each separate wall of each individual block. When the level is started, it iterates through all the walls and searches for overlapping identical walls. So two square blocks side by side will share a wall between them, and that can be removed. This helps, but doesn’t solve the problem completely.

The algorithm for comparing walls is actually pretty simple. Grab the verts of the wall being considered, convert them to world coords, then compare to the verts of each other wall. If you can match off every vert with one from the other wall, both walls are redundant and can be removed. In this game, you only have to consider walls from the neighbouring blocks (including above and below), since any other blocks will be too far away to have overlapping walls.

The next iteration performed the wall removal as above, then also iterated through all the remaining mesh colliders and stitches them into one big mesh. Well, two big meshes – one for normal grass, and one with different physical properties for mud.

The algorithm for stitching colliders together feels more complex at first, but actually it’s pretty simple again. You generate a new empty mesh with no verts, which will be the output mesh. Then you iterate through all the input meshes (after removing redundant walls) in turn. For each one, consider all of it’s triangles in turn. For each triangle, translate the verts into world coords and see if a vert already exists in the output mesh. If it doesn’t, copy it in. If it does, remember which one it is. Create a triangle in the output mesh that matches the one from the input triangle, and move on to the next. Once you’ve worked through all triangles from all meshes, you’ve got one big mesh with shared verts in all the right places. The physics engine now gives perfect rolling behaviour across the seams, which is a total solution to the problem…

…except it’s slow. 10 seconds or so on a typical level, and 30 on a big one. I did consider simply hiding the mesh creation when the level was first entered, but you have to allow for the player’s edits. That means you have to run it at the point where the player hits “play”, and 10 seconds is totally unacceptable there. I considered computing the fixed part of the mesh at the start of the level, then adding in the user blocks later. Turns out that doesn’t let you remove redundant walls around the edges though, since they’ve already been stitched into the main big mesh.

I was including collider geometry as a GameObject within each block, and physically deleting it from the world. That works, but it turns out that creating and deleting all those GameObjects costs quite a bit of CPU time. The solution was to remove them from the prefabs, and instead load example wall meshes from Resources into memory. There’s a list of which ones each block requires, and it just uses the data from the shared meshes over and over, rather than creating/deleting them. Sounds obvious, but it does complicate the workflow of creating a block quite a bit, and you don’t get automatic translations between the local and global coords system when working through the mesh data.

The final technical issue was the Everyplay plugin. This is a lovely bit of software that lets people record their gameplay, then share it with other players. So if you pull off a spectacular trick shot, you can send it to your friends, show off with other players and so on. The plugin integrates pretty easily, and works fantastic on most Android devices. On some Androids however it doesn’t work, and worse than that, it totally breaks the rendering of the game, displaying a black screen. Everyplay is supposed to cope with this by asking a server if the current device is compatible or not, but it doesn’t seem to know the answer. In the end, we made a simple white-list of devices where it worked, and left it at that. When new devices are launched, we’ll have to update the game to include them, but that’s better than running the risk of ruining people’s games entirely.

Hero Squad 2

Sunday, June 29th, 2014

HeroSquad2Race to the emergencies as fast as you can in this open-world driving game. This is a sequel to the original popular Hero Squad game, with all new missions, new gameplay mechanics and a new continuous score-attack mode.


Play Hero Squad 2: Rapid Response in your browser.

Wizards vs Aliens: The Eye of Bashtarr

Sunday, June 29th, 2014

WizardsVsAliensTest your platforming and puzzling skills in this game for the CBBC show Wizards vs Aliens, built by Aardman Digital. Use each character’s strange and unusual powers of magic and science to levitate rocks, hack enemy sentries, control the environment, slow time and more.

Play Wizards vs Aliens in your browser.

I worked on level design, UI and back-end server integration on this project, with the talented Tom Milner as lead developer.

Home Sheep Home 2: Steam

Wednesday, February 26th, 2014

hsh2_steamOnce upon a time I made a cute browser game called Home Sheep Home for Aardman Animations. It was a surprise hit, so we built a sequel, Home Sheep Home 2: A Little Epic. We released this on the web in low-res episodes, and on iOS as an app, and as a glorious super-high-res packed-with-extras Windows desktop version.

But this was the little game that dreamt of being on Steam, the PC’s premier download platform. It’s taken years to get there, but finally it has made it!  And in style too, with tons of Steam achievements and lovely Steam cloud saves too. So what are you waiting for? Go and get it immediately! Especially if you enjoyed Thomas Was Alone which takes much of its gameplay mechanics from this game.

Buy on Steam

White-Out

Wednesday, February 26th, 2014

White-OutTest your skills in this multiplayer paint flicking game made in just 48 hours at Global Game Jam 2014. Play White-Out by yourself for , with a friend, or in a group of four people all on the same device. Suitable for young children and adults alike. If you can flick your finger, you can play this!

No longer available on iPad due to Apple purposely obsoleting software just because it’s old. I can recommend many good Android devices!

Play FREE on you Android tablet

This app was featured on the Mac Rumours website. Thanks guys!

Built with Unity3D

unity-logo

ss Great Britain: Full Steam Ahead

Sunday, August 25th, 2013

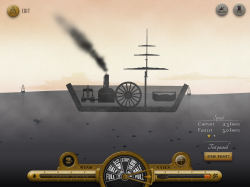
Full Steam AheadDesign, build and sail epic steam ships in this educational game from the ss Great Britain Trust and Aardman. Cross seas, carry cargo, fight tug-o-wars, try for top speeds and more. Make sure your ship’s hull is strong enough to withstand the rage of the sea. If it isn’t up to scratch, it’ll break up and sink!

Play Full Steam Ahead in your web browser.

Download as an app for your Android tablet.

Download for your iPad.

Technical Analysis

This is the first game I’ve released to work on several platforms: in a browser, iOS and Android. It turns out Flash is a superb platform for this, within certain constraints. The two big issues you have to deal with are screen shape/size, and mobile performance.

Screen shape/size
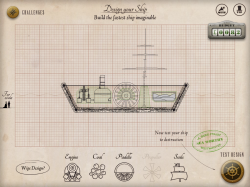
IMG_0058The array of screen resolutions and aspect ratios available now is bewildering. Just on iOS you have everything from a tiny low resolution iPhone 3, way up to a crazy high-res iPad4. Add in Android devices, and you have only two choices – design at a fixed aspect ratio and accept that most devices will have black bars at the edges, or you can make your design re-flow itself to different devices.

We chose the latter, and I’m glad we did. Black bars on devices look lazy. We created the design around the iPad2’s screen, but always with the possibility of it scaling to wider displays. We used a background texture that could scale up until it fit any screen. Then added elements like panels, flourishes and buttons that were driven in code to sit in calculated positions such as the corners, centre-top, absolute centre and so on. The centre content was scaled to fit as best as possible without breaking its aspect ratio, and everything else was scaled by the same amount then repositioned to its fixed positions.

My approach to this in build involves tagging movieclips with various properties to tell them where they should go and how they should scale. This is far easier than specifying the names of everything that should be positioned in code, and helps avoid you becoming lazy about specifying suitable auto positioning properties for things.

We couldn’t use huge high resolution retina textures for everything due to performance and filesize worries. Instead we mask some of the lower resolution textures with overlay noise, and keep detailed things like text and the fancy flourishes in vector so they render at the native resolution.

Performance

Mobile performance is lousy for native Flash display list elements. It’s better with bitmaps than with vectors, and you can take advantage of cacheAsBitmap to get the best of both worlds if you design with it in mind. Native display list elements are far easier to work with than frameworks like Starling however, so I decided to try to stick with them as much as possible. In this game, that means that all the UI screens are native display lists, and when you’re driving your ship around in real time, everything is rendered in Starling on the GPU. This hybrid approach works well, but you have to design the UI with minimal motion in mind. This game suits this approach well, but not all would.
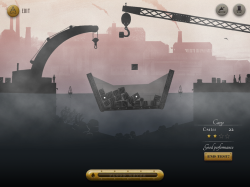
IMG_0054This was my first experience of Starling, which turns out to be a lovely framework. It’s small and simple enough to be understandable (even modifiable as I’ll discuss later), but powerful enough to be very useful. Mirroring the display list APIs means that seasoned Flash programmers feel at home with minimal learning effort too.

It’s well worth being aware of how Starling works for context switches and draw calls. If you can keep these low, performance may surprise you with how strong it is! It’s quite easy to accidentally add in context switches by interlacing sprites from different textures in the same display list container.

Performance on iOS initially looked awful all round. Then I realised that the default quick build mode gives you an interpreted binary, which executes very slowly indeed (maybe 10x slower for code execution). There are other options for creating properly native code, so make sure you understand what each option does before you write off iOS performance as hopeless. The native compile however added an extra 5 minutes to the overall build time on a quad-core i7 processor (which for the test version was just 10’s of seconds).

Because of the excessive build time for a high performance iOS build, I used Android tablets as my mobile development devices and only cross compiled to iOS occasionally to make sure things were still good there. I found AIR’s compatibility across Android and iOS to be exceptional, and the code contains almost no special conditions for iOS. The only major difference I found was in managing selections in textfields, which I couldn’t get to work with iOS’s built in software keyboard.

The other advantage of building for Android first is that installing on devices is far easier. It’s hard to imagine how Apple could have made their provisioning system any less helpful to developers, and the exact opposite can be said for Android. I set up my compile script to simply copy the Android APK file into my Dropbox folder on my desktop, then I could just install it via Dropbox on my devices with just a couple of taps. I could send development links to anyone else via a Dropbox share link too.

While I’m on an Apple rant, I’ll also add that the Google Play store release procedure is leaps and bounds ahead of the Apple App Store’s confusing iTunes-Connect mess. And forcing developers to own a Mac to upload iOS apps? Lousy.

Simulation

Full Steam Ahead is a game about sailing ships of your own design. For that, we needed a half-decent physical model of breakable ships and wavy seas. We chose Box2D as usual for our physics engine, but had to improvise how to do the breakage and water elements.

Destructible Hulls

The ships you design in Full Steam Ahead are capable of breaking up if they hit the shore, sea floor, are overloaded or just badly shaped. A wide and weak ship can be broken up by the action of the waves too. To model this, I take the ship-shape that the user has drawn and chop it into squares on a grid. Then I add the beams that the user has specified around the edges. On top of all that I join adjacent hull cells and beams etc with weld joints. Each frame I check the stress at each joint. Over a limit specified by the materials in question, and I delete the joint and add some damage to the hull texture.

This approach is great because it deals with any situation thrown at it. If a ship is bent in half over a big wave, it will snap along the middle. If the tide goes out and it scrapes a big rock on the sea floor, it will break the hull in the right place. You can even add an engine that is too powerful and rips itself free of the hull at the right point.

What this doesn’t do however is sink. Buoyancy is based on the area below the water, so if a ship floats, so does a small chunk of that ship (as far as Box2D is concerned). To deal with this, the game keeps track of which edges of which chunks are nominally open to the sea. You can deliberately leave parts of the ship open (e.g, the deck) to save weight and cost. We also mark edges as open to the sea if their weld is deleted through being overstressed. If any open edge is under the height of the sea at that point, it starts to flood into the hull’s cell. As it floods I increase it’s density up to a limit, to simulate the extra weight of water inside the compartment.

Flooding a single cell works well, but feels unrealistic. Only the edges of the ship flood when exposed to water, and the rest stays dry. I tried just flooding every cell a little when the ship was leaking, but this leads to more unsatisfactory looking results. A ship open at just one end will sink evenly, rather than going down nose first. Also, a ship that breaks into two parts – one that floods and the other that is still seaworthy – still sinks both halves. The water does not ‘know’ that the two parts are disconnected.

The solution was to spread the water from each cell to its neighbour along the welds. If a weld is present, the water is slowly equalised between the two cells. If there is no weld, the water does not cross into the next cell. This means that a ship floods gradually from any damaged point, not necessarily evenly. A broken but seaworthy chunk may stay floating forever while another part could break off, flood and sink.

Sea

Box2D provides a built in Buoyancy Controller class which gives you a single perfectly straight water line across the world. It extends infinitely in either direction and does not support curves. It works by slicing shapes against the line, and measuring the portion under the water. That part is perfect for Full Steam Ahead, but I had to add the waves myself. The solution was to model the surface of the waves as a sum of multiple sine curves, all defined in the level designs. These are sampled and drawn to the screen as modified Starling Quad objects (they don’t have a texture, just an alpha colour). The modification is that they don’t have to be perfectly rectangular. Instead they are trapezoid columns, together modelling the top of the wave in segments.
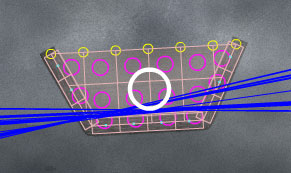
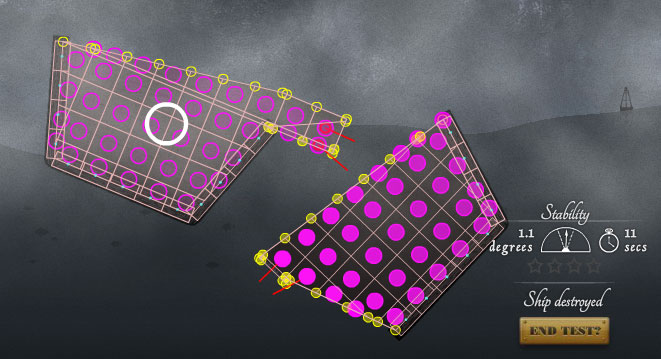
full-steam-ahead-buoyancyTo compute the physics, each floating cell of the ship is given its own buoyancy controller (blue lines in the screenshot). Each frame, I update the controller by re-sampling the sea waves at the X position of the object. As far as each individual floating item is concerned, the sea is flat (although probably angled and moving over time). Aggregated together, the ship’s hull experiences a curved wave.

With any complex simulation like this, it is essential to be able to see what’s going on behind the scenes while developing. The screenshot below shows the cells of a broken ship in pink, with red lines indicating broken welds. Yellow lines indicate flooding points (filled in yellow if they are currently underwater). Pink circles show centre of mass of each cell, and have darker centres if they are more flooded. The large white circle shows the centre of the largest connected part of the ship, and is used to determine what the camera watches.
full-steam-ahead-debug


Hero Squad: Rapid Response

Sunday, November 18th, 2012

Hero Squad: Rapid Response, is an ambitious driving/flying/sailing game built with Aardman Digital for the BBC. It helps promote a new children’s show called Hero Squad on CBBC. Train for active duty in the rescue services alongside the kids in the TV show!

Play Hero Squad: Rapid Response.

This game plays much like the earlier GTA games (now available as fully legal free downloads), but with a lot less nefarious activities. It’s all about getting to the scene of an incident as fast as you can in either a fire engine, a lifeboat, or a coastguard helicopter.

There were quite a few technical innovations required to bring this game to life. We wanted the gameplay to exist in a large free-roaming game world so that you could plat your own route to each incident. You can take shortcuts if you want, and the road layout was meant to look plausibly like a fictional coastal town in the UK. This meant that roads should almost never be set on a grid, which always makes a game map look like an American city.

CGI

You view the action from essentially a top-down view, except that it’s not quite directly above. The camera looks to the north slightly so you can see the sides of buildings, vehicles etc. To achieve this, all relief sprites in the game were created by Aardman’s awesome CGI department, and rendered into 3D turnarounds of each item. Every car, boat, building, tree, fence and even lamp-posts is a multi-layered set of sprites, separated into a colour layer, a shadow layer and sometimes into a matte layer (for vehicle recolouring). The sheer amount of assets included is astonishing, and runs to several thousand separate bitmaps.

Map

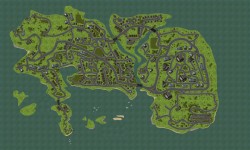
The map itself is created in Flash, and composed of the aforementioned sprites for buildings and vegetation, dynamically depth-sorted above textured vector roads and fields. The area of the map is simply huge, being 20480px wide and 12288px tall. Far too big to work on in one piece in Flash. Simply viewing the full size map at once in the IDE easily causes Flash to crash, so the map is broken into 1024x1024px squares. These exist on individual frames in small groups of tiles, so that the seams can be worked on in-situ for each larger area.

At runtime, each tile is only added to the stage as needed, along with all the underlying physics logic for that tile. At any one time, there are only a few small chunks of the map in action, which keeps the number of items being depth-sorted low. It also keeps the amount of objects in Box2D to a minimum, making collisions faster to process. Tile graphics are cached to bitmaps as the vectors are rendered, of course. This doesn’t include buildings and other relief objects however, as these have to be depth sorted against the traffic on the roads.

We processed the map into a single 250 megapixel image after production. Placing it side-by-side with exports of the GTA-3 map, they are roughly equivalent! We believe this to be by far the biggest continuous, non-tileset game area of any Flash game to date. If you know of any bigger, post a comment!

Download large JPEG (1mb)

Download HUGE JPEG (30mb. Warning: This may crash your browser!)


Physics

In-game physics is provided by the ever-spectacular Box2D. The helicopter is a pretty simple vectored-thrust model. A torque is applied to turn it to a heading, and a rotational friction is applied to fight that action. Forwards/backwards are simple impulses.

Lifeboat physics is more complex. It consists of a virtual keel that opposes sideways motion, but not fore/aft motion. The motor just pushes the boat forwards, and a torque changes it’s heading. It’s actual path of motion however is determined by the sideways-force on the keel.

The firetruck (and all cars/busses/lorries) have the most complex physics model. It has two virtual wheels that operate a bit like the boat’s keel, but at each end of the vehicle. When the player steers, the front wheel is turned smoothly to an angle. Slip angles are calculated from the linear motion at the point of the wheel, and a sideways force is generated and applied. The resultant slip angle force is a simple model that works similarly to real tyres, where more angle means more force – up to a limit. After that, grip drops off progressively. Acceleration/braking is applied as a force along the line of the wheel, and steals from the traction circle available for sideways forces. Accelerating/braking also affects a weight-shift variable, which modifies the grip available (the size of the traction circle) at each end of the vehicle.

This attention to detail means that you can get all sorts of realistic looking situations happening with the firetruck dynamics. Accelerate through a corner and it will understeer. Brake mid corner and it’ll plow straight on. Lift-off mid corner and you’ll get oversteer, which you can catch with opposite lock and a powerslide if you’re skilled enough! If not, you may end up fishtailing, or spinning out entirely. You can do reverse J-turns, and even donuts if you set it up just right with a suitable piece of grass.

For the ground, the same physics are created no matter which vehicle you happen to be driving at the time. There can be sea, air and road traffic existing together no matter which vehicle you’re using. Extensive use of Box2D’s built in collision bits and categories helps differentiate the various things that should collide for each of the vehicles. For example, boats collide with the grass layer so that they never cross land. The helicopter only collides with the special tall building layer, which is not in the same position as the ground building collision layer. The firetruck collides with buildings, vegetation, fences and fields of course, but also collides with the grass layer but with no collision response. It is only used to determine when to put cars into a low-grip situation so they slide further on the grass.

Vehicle AI

Non-player-controlled vehicles in Hero Squad are driven by a computer AI. They follow guides built into the map tiles, but they have to be real drivers. To make collisions with other cars look as realistic as possible, all cars are physically modelled. That means the AI drivers have to actually use an accelerator, brakes and steering just like the player does. They measure their distance from a centre-line that runs down the middle of every drivable road, and try to steer such that they are a set distance to the left of it. When you press space to sound your siren, they internally alter this distance to be greater, and the AI automatically pulls them over to the edge of the road. Drivers are free to go wherever they like, and at any junction they just pick a random direction to drive in. Some roads are marked as one-way, so drivers don’t end up in dead-end streets with nowhere else to go.

Cars are added to the map to random road segments that are off-screen. The AI has to be smart enough to deal with what happens if there are no more road segments – remember there’s not much of the map available at any one time. When they’re lost, and don’t have a current road segment to follow, they are eligible for removal from the world, and are recycled into a new car somewhere else.

Wind/Water currents

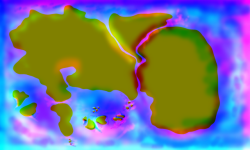
When flying the helicopter, and driving the boat, you are pushed around by wind and currents in the water. Both effects are achieved with a bitmap vector field directing the flow of each particle. New particles are instantiated at random. Every frame, they look up the colour in the vector field bitmap. The red channel encodes the left/right force, and blue encodes up/down. The particle simply moves according to that force.

The vector field image itself was created by hand in Photoshop. I started with a simplified monochrome map of the land. Then I painted 0x800000 to the red layer, and 0x000080 to blue. These values are right in the middle, and mean “no force”. Then I painted bright red to the land anywhere I wanted the water to flow right, and black wherever I want it to flow left. The same with blue for up/down. If you want to reduce the amount of current in an area, you simply paint with 0x800000 or 0x000080 to bring the values back to the ‘middle. This is very similar to how Flash’s BitmapDisplacementFilter encodes values.

Once finished, the layers are set to blendmode “add”. The resulting bitmap encodes all the forces that make up the currents. You can use things like the smudge tool and blur filters to alter the smoothness and tweak individual areas. I managed to get the water flowing around rocks, up and down streams and so on with this method.